44 twill tape labels tutorial
How to Get Started with Fashion Embroidery - Sew Pomona Push bottom label up to center. Find end with two loops and cut through both loops. Return labels to start position and gently pull-out single strands of floss. Remove both labels from ends outward. Untwist skein to form an oval. Cut through all ends on one side and remove floss strand to use. Slide labels back on after use to keep organized. What is Twill Tape? (with pictures) - Home Questions Answered Twill tape is a type of fabric tape that is woven in a twill pattern, meaning that it has parallel diagonal ribs. This woven pattern is extremely sturdy, making the tape a very popular sewing notion; twill itself has been woven for centuries. Most sewing stores carry this tape, typically in an assortment of colors, weight grades, and widths, to ...
ART - just do it!: May Card Club - kraft corrugated paper, ribbon ... I added the ribbon securing the ends on the back using double sided tape and then added the three gold brads. I embossed and trimmed the decorative strips and overlapped them a bit before gluing them together. I slipped them under the ribbon and secured them to the corrugated with double sided tape.

Twill tape labels tutorial
8 Ways to Label your Quilts - and why you should! - Scrap Fabric Love You can machine stitch the twill tape label into the corner and then hand stitch the binding over. You can also use an inkjet printer to print your design onto your twill tape labels using this tutorial. Photo by InkedPapers Additionally, you can order custom-made twill tape labels on Etsy. V1546 Halter Dress pt 1 of 4 - Prepare to DIY I'm cutting a bit of twill tape for the halter ties and sewing them at the shoulder seams. I'm also going to finish the neck line so it will be accurate in the fitting. I stitched along the edge at 1/2″. This gives me a mark to fold to and a sturdy point to snip the curve to, plus it makes folding back the edge easier. Unpaper Towels - Tutorial - Simplifi Fabric We started by folding a half meter of 3 different fabrics - there are Hemp Organic Cotton terry 340gsm, bamboo french terry 280gsm and organic cotton terry 340gsm . We took a folded half meter and cut it into 16 pieces by folding it in half and cutting, and then in half again and cutting. They are approximately 8x10" each.
Twill tape labels tutorial. How to Sew Pajama Pants From a Vintage Sheet - My Frugal Home Cut along your marks. Now fold the right side of your sheet over, and position the piece that you just cut on top of your sheet, with the bottom of the pants leg lined up with the bottom of the sheet and the folded seam lined up with the right (folded edge) of your sheet. Trace and cut around the cut piece. How to Make a Quilt Label? Master Creating Quilts That Stand Out Layer the label with a piece of lining fabric, right sides together, and square everything up to the desired size. Image source: Quilting Daily Now, you can join the label and lining with a quarter-inch seam all the way around. Also, trim small triangles off the corners to reduce bulk. Cut a slit one or two inches long in the lining. 29+ Tips mac amber times nine tutorial - AlbanyBailey On Mac running an older version of macOS. 9-mrt-2022 - Bekijk het bord make up van Kim Withaegels op Pinterest. I have been making my own labels for a couple of years now pretty much the same way but on twill tape. MAC Amber Times Nine Eyeshadow Palette. Amber Times Nine palette are a perfect match for all shades of blue eyes. Expert Tips & Tricks for Labeling Your Quilts - making it fun Handwrite a length wide twill tape using a micron pen, fold it and sew it into a seam! In addition, you can take the twill tape and add some fabric borders and have a fancy label that can be stitched to a flat surface. Tips from Mel Beach from Mel Beach Quilts: Start with a 6-8" square of a light color fabric.
In Color Order: Tutorial: Easy DIY Row Markers for Quilting My washi tape is 7/8" wide. Wrap the tape around the flat section and press to secure to the bobbin. Tip: An easy way to cut the tape is to lightly stick it to your cutting mat and cut with an old rotary blade or an exacto knife. 3. Use a permanent marker to number each marker. 4. Hook each marker onto a safety pin, through the hole at the top. How to Sew a Tote Bag the Easy Way | Free Pattern Step 4: Sewing the Sides of the Tote. Here comes the easy part. Fold the tote in half to bring the two top edges together (wrong-side-out). Pin the sides of the bag together and sew a straight stitch down the full length of each side. Optional: You can sew twill tape or bias tape on top of the side seams for additional durability, as shown in ... Made by a Fabricista: From Meetings to Happy Hour Labels Dress 163; 2021 Fabricista 130; Independent Patterns 93; Knits 91; Woven 82; The Big Four 77; Sewing 66; Linen 65; ... DIY Tutorial 13; New Look 13; Reader's Pick Sew Along 13; Sewing with knits 13; StyleArc 13; Travel 13; Tutorial 13; Vogue 13; ... Twill Tape 1; Twin Needle 1; Ultimate Trousers 1; Universal 1; Unmentionables Worth ... Simplicity 9052 - Style Maker Fabrics - Girls in the Garden Sleeve tabs Pockets and front closure Zipper Back vents (not sure what to call them) Some thoughts - I used bias tape to finish the seams - I used twill tape for the casing at the waist, finish the seams at the zipper- zipper placket area, and at the hem. - I used a label to finish the edges of the back vent
How to Make a Drawstring Bag - Chic n Scratch Twill Tape ; Friction Ball Erasable Pen ; Lori Holt Stork Scissors ; Creative Grids 12-1/2" x 24-1/2" Ruler ; Creative Grids 4-1/2" x 8-1/2" Ruler ; Fiskars Rotary Cutter ; Quilting Safety Pins ; Ruler 2.5" x 8" Aurifil Thread; Pins ; The Chic n Scratch labels were purchased online at the Dutch Label Shop. Baby Baseball Cap/ Free Sewing Pattern + Tutorial Then sew the twill tape over the other open seam allowances. 58. View from the right side. 59. Fuse the interfacing to the wrong side of both blue visors. 60. Place both visors with blue sides together. 61. Pin both visors along the top edge together. 62. Sew together. 63. Snip into the seam allowance. 64. Turn the visor with the blue side out. 65. Gifts for Sewers of Clothing — Sabrina Lee | Sewing and Thrifting ... Personalized clothing labels. Clothing labels with your loved one's name or logo adds the perfect finishing touch to any handmade garment. ... Twill tape. This stuff is essential when tailoring garments. A spool of twill tape would make a great stocking stuffer. Tailor's ham and seam roll. These are essential pressing tools that help sewers ... necktie coloring page at getcoloringscom free printable - 9 printable ... Boys neck tie tutorial + free printable tie patterns · 1. Cut out the shape and use it for coloring, crafts, stencils, and more. Holiday Handmade With Lil Luna Source: 3.bp.blogspot.com You can either paint them in one single color . A small piece of double fold bias tape, twill tape, or ribbon for the tie keeper. Tie Outline Printable Clipart Best
Gertie's New Blog for Better Sewing: Stabilizing a V-Neck with Twill Tape
How to Make Super Quick & Easy Bunting - Fabricate String 'em up. Grab your cotton twill tape & press in half lengthwise (if you're using bias binding this will already be done for you. Ribbon might resist a press & be careful not to melt it) Once pressed decide how long a length you want to leave at the end (I left around 6"/15cm) & how far apart you want to space them.

Our Nesting Ground: Reversible Crib Rail Cover Tutorial
Eucalyptus Tote Bag Tutorial - Peony Patterns Fold the sewn edges to meet your marked lines. Press the fold and pin / clip in place. Sew at 1/8" (3mm) from the sides of the pocket. Place your bias tape against the long sides of the pocket piece and add 3/8" (1cm) to the length. This will determine the length of bias tape that you need to bind your pockets. Cut 2 strips.

20+ best sewing projects for men's gifts they'll actually use!
How to Make Clothing Tags - 4 Options - Melly Sews Just sew the clothing tags in and let the raw edges fray to the stitching line. I've found these labels hold up very well since I print them on quilting cotton. They don't fade unless I use a lot of bleach, and they're softer than many woven labels and get softer the more they're washed. 4. Custom Iron On Labels
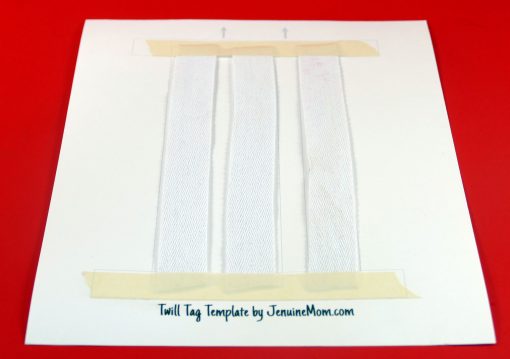
DIY Fabric Labels on Twill Tape - Jennifer Maker
How to Sew a Lettuce Crisper Bag - My Frugal Home (2) drawstrings - cording, ribbon, twill tape or double-fold bias tape (approximately 36″ long) A safety pin, or bodkin; A sewing machine (This is the machine that I have) I picked up a two-pack of hand towels from Target for $2.75. I had everything else on hand, so these crisper bags cost me $1.38 each to make.
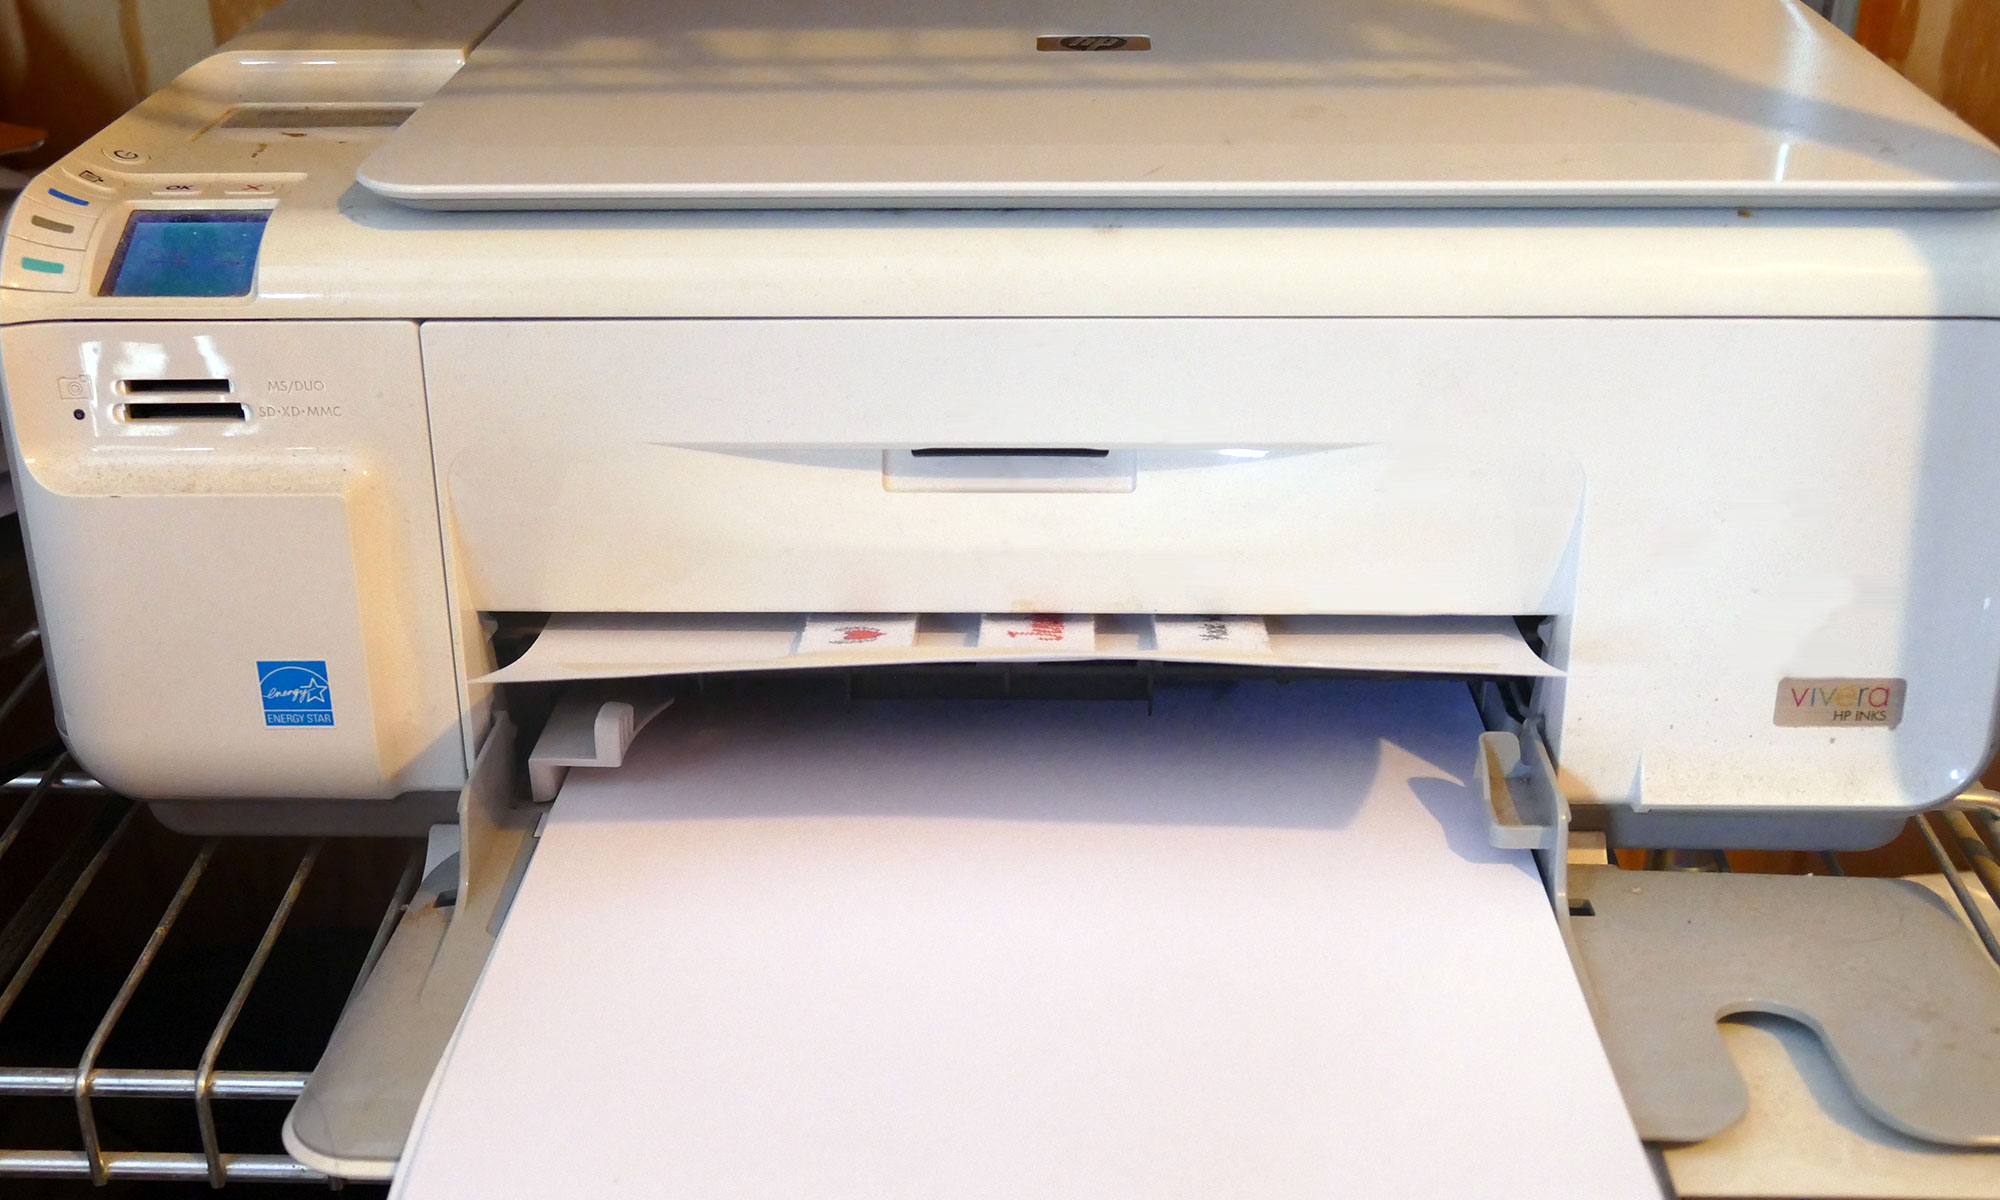
DIY Fabric Labels on Twill Tape - Jennifer Maker
The Making of My Quilt Coat Part 3 - Elm Street Quilts You can read the part 1 and part 2 posts for more tips and photos but wanted to list some keys recommendation here - both for you and for me if (WHEN!) I make a second one: Trace and cut the pattern pieces onto the Swedish Tracing Paper Adding binding to pockets and consider making them larger Use the walking foot to install the zipper
Post a Comment for "44 twill tape labels tutorial"